Running Encrypted VMs on openSUSE Tumbleweed
Since May 2021 openSUSE Tumbleweed has support for running encrypted KVM guests using AMD SEV-ES. This article explains the steps to setup an SEV-ES guest on Tumbleweed using libvirt.
SEV and SEV-ES in a Nutshell
Secure Encrypted Virtualization (SEV) is a hardware feature of AMD EPYC processors which allows to encrypt the memory of virtual machines. Using SEV, most of the guests memory is encrypted by the hardware. The hypervisor can only access the encrypted data and the guest can decide which parts of memory are not encrypted. Unencrypted parts are needed so the guest and the hypervisor can communicate, e.g. via DMA buffers.
With Encrypted State (SEV-ES) the guest registers are also encrypted, so that the hypervisor can’t access or modify them anymore.
SEV is already supported for some time in openSUSE Tumbleweed, SEV-ES support is available since QEMU 6.0 made its way into the distribution.
SEV-ES is fully supported on AMD EPYC 7xx2 and 7xx3 processors. In order to run SEV-ES guests the host needs some preparation.
Setting up the Host
First, memory encryption needs to be configured in the BIOS settings together with an ASID range for SEV. If asked for a minimal SEV ASID, use a value greater than one to have ASIDs available for SEV-ES guests.
ASIDs are Address Space IDentifiers which the hardware uses to select the right encryption key when accessing encrypted memory. For SEV and SEV-ES the hardware defines fixed ASID ranges which the KVM hypervisor has to use in order to run encrypted guests.
Configuring the KVM-AMD module
When the BIOS is configured correctly and the system has booted, SEV and SEV-ES need to be enabled in the kvm-amd module. Linux kernels v5.13 and newer enable them by default, for older kernels the module need to be loaded with:
# rmmod kvm-amd
# modprobe kvm-amd sev=1 sev-es=1
When everything is loaded correctly something like below shows up in the kernel log:
# dmesg | grep SEV
[    5.864830] ccp 0000:22:00.1: SEV API:1.28 build:28
[   10.407685] SEV supported: 254 ASIDs
[   10.407687] SEV-ES supported: 255 ASIDs
The output shows the ASIDs for SEV and SEV-ES. If there are no ASIDs for SEV-ES reported, then the BIOS is not configured correctly or the platform lacks SEV-ES support.
Setting up LibVirt
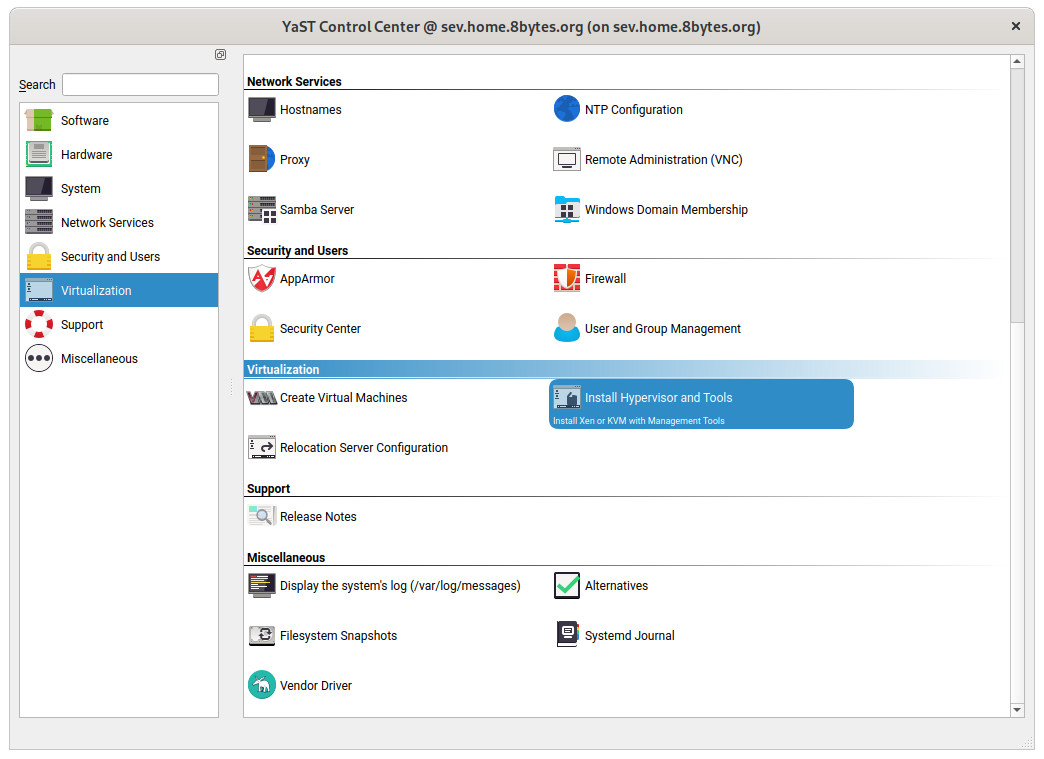
In order to use libvirt to launch SEV-ES guests it must be configured on the host for using the KVM/QEMU backend. A virtual network bridge is also required. On openSUSE Tumbleweed the easiest way to set this up is using YaST. Start YaST and go to Virtualization and select Install Hypervisor and Tools:
In the next window, select KVM server and KVM tools and go to Accept
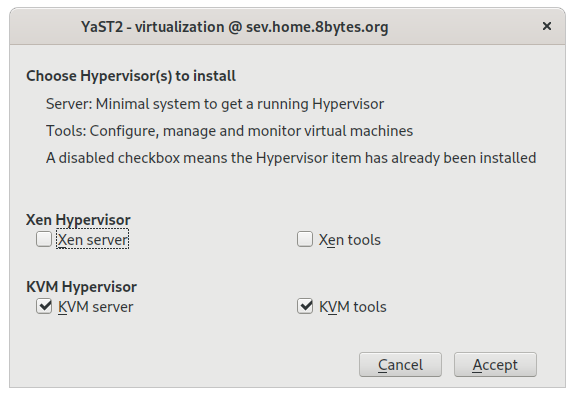
Note that Xen does not support SEV or SEV-ES, so setting up a Xen Server will not allow you to launch encrypted guests.
When installation is finished libvirt is ready and a virtual bridge should appear for KVM guests.
Installing an Encrypted Guest
With libvirt up and running an encrypted guest can be installed using the virt-install command. Something to note is that during installation the guest is only protected by SEV and not SEV-ES yet. That is not a problem as SEV-ES can be enabled after the installation is complete.
The reason for using SEV during installation is that the installer will reboot the virtual machine after completion. But rebooting a guest is not supported at the moment with SEV-ES, it can only be shut down and started again. To make the installation succeed, it runs only with SEV protection.
Now to the installation, I chose an openSUSE Tumbleweed guest. Some special parameters need to be passed to virt-install. The full command line is:
virt-install \
    --arch x86_64 \
    --name "TW-SEV-ES" \
    --vcpus 4 \
    --cpu EPYC \
    --memory 4096 \
    --machine q35 \
    --memtune hard_limit=4563402 \
    --disk size=32,target.bus=scsi \
    --controller type=scsi,model=virtio-scsi,driver.iommu=on \
    --network network=default,model=virtio,driver.iommu=on \
    --launchSecurity sev,policy=0x3 \
    --boot loader=/usr/share/qemu/ovmf-x86_64-code.bin,loader.readonly=yes,loader.type=pflash,nvram.template=/usr/share/qemu/ovmf-x86_64-vars.bin,loader_secure=no \
    --install os=opensusetumbleweed
This configures a guest with 4 emulated EPYC vCPUs and 4GB of memory on a 32GB virtual disk.
The –memtune hard_limit=4563402 parameter is important for SEV and SEV-ES guests. It sets the amount of memory the QEMU process is allowed to lock in memory. Currently all guest memory for SEV and SEV-ES guests need to be locked, so a high limit is needed to cover all guest memory and MMIO regions.
For the –controller and –network parameters the virtio models are selected. For all virtio devices attached to the guest, the driver.iommu=on parameter must be specified too, otherwise the devices will not work in the guest. The parameter tells the guest’s device drivers to use the Linux kernels DMA-API. This is required because DMA data in SEV(-ES) guests always goes through unencrypted bounce buffers. KVM and QEMU can not write to encrypted guest memory directly.
The –launchSecurity parameter enables SEV for the guest. The important value here is the policy. The policy is a bit-field which enables or disables SEV features. Bit number 2 will enable SEV-ES, but it is not set yet for reasons discussed above.
With –boot the firmware image is specified. For SEV-ES guests an OVMF UEFI BIOS with SEV-ES support is required. Currently there is no way to select the correct OVMF binary for SEV-ES automatically, so the command line above directly specifies the correct image.
Finally, the –install parameter set the guest up for an installation of openSUSE Tumbleweed. It is strongly recommended to select full disk encryption during installation, because otherwise the data on the virtual disk will be visible to the hypervisor. Using disk encryption is not a requirement, but it also makes no sense to have the guests RAM and registers encrypted and store the data on disk unencrypted.
Currently this means that the disk password has to be entered manually when the VM is started, but work is in progress to automate this step using attestation and secure key provisioning.
Once installation is complete the installer reboots the guest. To check whether SEV is enabled, look into dmesg:
$ dmesg | grep SEV
[    0.127250] AMD Memory Encryption Features active: SEV
This shows that SEV is enabled, but not SEV-ES. To enable SEV-ES the guest needs to be shut down. Then, on the host, the configuration of the guest can be changed using virsh:
# virsh edit TW-SEV-ES
TW-SEV-ES is the guest name as specified in in the –name parameter of the virt-install command. Above command will launch and editor to edit the XML configuration of the VM. Search for the launchSecurity section:
  <launchSecurity type='sev'>
    <cbitpos>47</cbitpos>
    <reducedPhysBits>1</reducedPhysBits>
    <policy>0x0003</policy>
  </launchSecurity>
SEV-ES can be enabled by changing the number in the policy section. Bit 2 needs to be set, so that the 0x0003 turns into 0x0007. Save the file after the change and exit the editor.
The configuration now specifies SEV-ES and the guest can be launched again. It should boot as before and when it is up, the SEV features can be checked with:
# dmesg | grep SEV
[    0.127264] AMD Memory Encryption Features active: SEV SEV-ES
The guest is now protected using SEV-ES and the hypervisor can’t track the contents of guest memory or register state anymore.
Have a lot of fun experimenting and playing with your SEV-ES guest 😎